Ensuring your dryer lint trap is clean is crucial for keeping your clothes dry and home safe. In this guide, we'll walk you through the steps to clean the inside of the dryer lint trap, providing you with an easy and effective way to maintain your dryer's performance.
Step-by-Step Guide to Effectively Clean the Inside of the Dryer Lint Trap
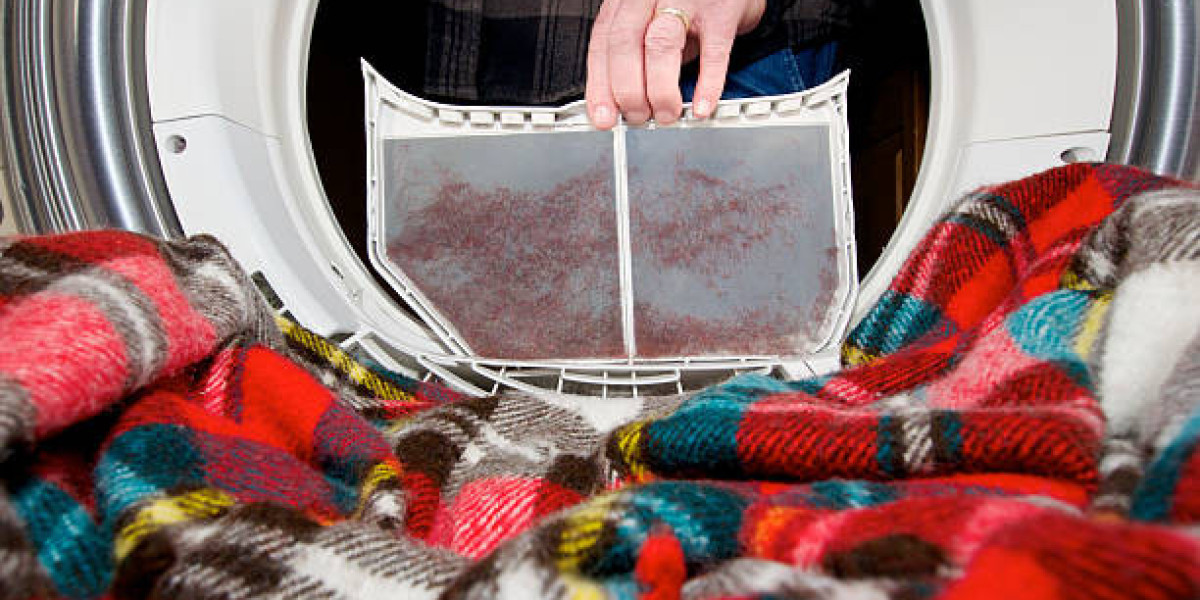
Keeping the inside of your dryer lint trap clean is crucial for efficient drying and fire prevention. If you're looking for the best in Dryer Vent Installation and Repair in Roswell, choose MMI Home Improvement Pro. Ensure a safer and more efficient dryer experience with our expert services! Let's explore the step-by-step process to achieve this.
Tools and Materials Needed for Cleaning Inside of the Dryer Lint Trap
To start, gather a few essential tools and materials. You will need a vacuum cleaner with a hose attachment, a long brush or flexible dryer lint brush, and a microfiber cloth. Ensure these are easily accessible before beginning the cleaning process.
Proper Techniques for Thoroughly Cleaning Inside of the Dryer Lint Trap
1. Unplug the Dryer:
Begin by unplugging your dryer to ensure safety during the cleaning process. Safety always comes first!
2. Remove the Lint Screen:
Take out the lint screen or trap from the dryer. Gently slide it out, making sure not to damage the screen.
3. Vacuum the Lint Trap:
Use the hose attachment of your vacuum cleaner to vacuum the lint filter compartment carefully. This helps remove loose lint and debris.
4. Brush the Lint Screen:
Take the long brush or flexible lint brush and gently clean the lint screen. This helps dislodge any stubborn lint that the vacuum might have missed.
5. Vacuum Again:
Once you've brushed the lint screen, vacuum the screen and surrounding areas once more. This ensures a thorough clean, leaving no lint behind.
6. Wipe Down with a Microfiber Cloth:
Take a microfiber cloth and wipe down the lint screen and surrounding areas. This adds a finishing touch, leaving everything clean and lint-free.
7. Check the Exhaust Vent:
Don't forget to check the exhaust vent. Ensure it's clear of any lint build-up by using the vacuum hose to clean it.
Frequency and Maintenance Tips for a Clean Inside of the Dryer Lint Trap
- Regular Cleaning Routine:
Make cleaning the lint trap a regular part of your laundry routine. Aim to clean it after every use to maintain efficiency and safety.
- Inspect and Replace:
Regularly inspect the lint screen for any damages. If you notice any holes or tears, consider replacing it to maintain its effectiveness.
- Professional Maintenance:
Schedule professional maintenance at least once a year. A technician can check for any hidden lint build-up within the dryer and ensure optimal performance.
- Keep the Area Around the Dryer Clean:
To prevent lint accumulation, keep the area around the dryer clean. Regularly vacuum the floor and remove any lint or dust.
Following these simple steps and incorporating regular maintenance into your routine can ensure a clean and safe inside of the dryer lint filter. Taking these precautions not only improves the efficiency of your dryer but also reduces the risk of fire hazards associated with lint build-up.
Learn more about Dryer vent cleaning: what you should know.
Troubleshooting and Common Mistakes When Cleaning Inside of the Dryer Lint Trap
Keeping your dryer lint trap clean is crucial for its efficient performance. Let's explore the signs of a clogged lint filter, common mistakes to avoid, and tips to overcome challenges.
Identifying Signs of a Clogged Inside of the Dryer Lint Trap
A clogged lint filter can cause problems, but how do you know if it needs attention? First, watch out for clothes taking longer to dry. If it feels like forever, your lint filter might be the culprit. Second, if your laundry room feels warmer than usual, it's time to check the lint filter. A clog could be blocking the airflow, making the room warmer than it should be. Keep an eye on these signs to catch a clogged lint filter early.
Avoiding Pitfalls: Common Errors in Cleaning Inside of the Dryer Lint Trap
When cleaning the lint filter, some mistakes are easy to make. People must remember to do it regularly, thinking it's not a big deal. However, paying attention to this simple task can lead to bigger problems. Another common mistake is only cleaning the visible lint. Remember, lint can go beyond what you see; get every nook and cranny. Lastly, using the wrong tools, like sharp objects, can damage the lint filter. Stick to soft brushes or vacuum attachments to avoid unnecessary wear and tear.
Tips for Overcoming Challenges in Maintaining a Clean Inside of the Dryer Lint Trap
To keep your lint filter clean, create a schedule for regular cleaning. This ensures you will remember this essential task. Additionally, take your time cleaning. Take your time clearing up the lint. Repair any tears or damage to the lint filter as soon as possible to prevent lint from bypassing the trap and causing problems. Consider putting a reminder near your dryer or in your laundry area to help you make cleaning a habit.
Enlist the assistance of an adult when dealing with a difficult lint filter scenario. They may offer advice and ensure that the lint filter is fully cleaned. Remember that a clean lint filter improves the performance of your dryer and lowers the risk of fires caused by lint buildup.
By remaining alert and adopting preventative actions, you can keep your dryer in great shape for years to come.