We all have those moments when we stumble upon an old item and think, "Can I bring this back to life?" Well, that happened to me recently with an old flower vase that had been tucked away in the back of my pantry. It was once a vibrant piece, but now, it was covered in faded blue paint and peeling black spray paint. Not exactly eye-catching anymore! I was about to toss it out when a brilliant idea struck me: Why not give this vase a modern makeover using acrylic paint and baking soda?
After seeing similar DIY projects online, I decided to give this forgotten vase a new lease on life. I wanted to create something with a contemporary, chic vibe—something that would look like it belonged in a stylish home décor store. Here’s how I transformed this old vase into a faux ceramic beauty with just a few supplies and a little creativity.
Step 1: Understanding the Power of Acrylic Paint and Baking Soda
Before diving into the transformation process, let me explain the magic behind mixing acrylic paint with baking soda. When combined, the two create a thick, chalk-like paint that dries with a matte, textured finish. This combination mimics the look of ceramic pottery. If you use earthy tones like red or brown, the end result can resemble terracotta.
Step 2: Prepping the Vase
First things first, let’s prepare our vase. Start by giving it a thorough clean with dish soap and water. Make sure to scrub off any dirt and grime, leaving the vase spotless. Once it's clean, dry it off completely with a towel.
Next, inspect the vase for any rough patches or peeling paint. If you find any, use fine-grit sandpaper to smooth out the surface. Think of this as giving your vase a quick “spa treatment” to ensure the new paint adheres properly. After sanding, wipe down the vase one last time to remove any dust.
Since DIY projects can get messy, it’s a good idea to protect your workspace. Lay down some old newspaper or a drop cloth to catch any paint splatters. This way, you can focus on your masterpiece without worrying about the mess.
Step 3: Creating the Faux Ceramic Texture
Now comes the fun part—mixing your paint. In a disposable bowl, combine four parts white acrylic paint with one part baking soda. Stir the mixture thoroughly until it’s well blended and has a thick, creamy consistency. This mixture will give your vase that desirable ceramic texture.
Step 4: Painting the Vase
Using a sponge brush, apply the paint mixture to the outside of the vase. Don’t rush this part—take your time to ensure an even coat. Once the first layer is on, let it dry completely before adding a second coat. If the vase is still a bit see-through after two coats, don’t worry—just add a third layer until you achieve full coverage.
Don’t forget to paint the inside of the vase as well, reaching as far down as possible. If you’re in a hurry, you can speed up the drying process by using a hair dryer.
Step 5: Adding the Finishing Touches
Once the base coat is dry, it’s time to add some contrast. Grab a roll of painter’s tape and place a strip around the middle of the vase, creating a straight line that divides the vase into two sections. This will help create a clean separation between the two paint colors.
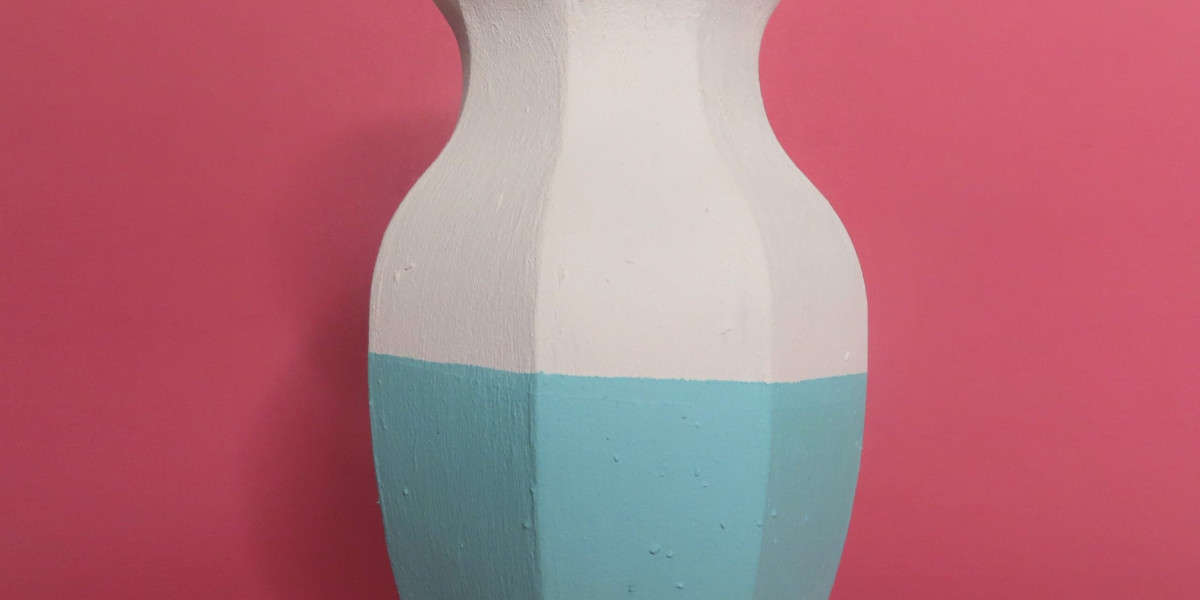
For the bottom half, mix another batch of acrylic paint and baking soda, but this time, choose a different color that complements your home décor. Apply the new paint to the lower section of the vase, ensuring it’s evenly coated. Once you're happy with the coverage, carefully remove the tape to reveal a crisp, straight line. Turn the vase upside down and let it dry completely.
Step 6: Styling Your Faux Ceramic Vase
Your vase is now complete, but how you style it can really enhance its look! For a cozy, rustic feel, fill it with dried or wildflowers and display it on a wooden shelf or farmhouse-style table. If you prefer a more modern aesthetic, go for fresh white blooms or minimal greenery and place the vase on a sleek mantel or contemporary side table. The key is to choose flowers or greenery that complement your vase’s color and style, and don’t be afraid to experiment with different placements around your home.
Conclusion: A Creative Masterpiece
In just a few simple steps, you’ve transformed an old, forgotten vase into a stunning faux ceramic masterpiece. Not only does this project give new life to something you might have thrown away, but it also allows you to add a unique, personal touch to your home décor. Whether you prefer a modern, rustic, or eclectic style, this DIY vase project is a fun and easy way to showcase your creativity.
So, next time you come across an old item that’s seen better days, think twice before tossing it out. With a little imagination and some DIY magic, you can create something truly beautiful that will have everyone asking, “Where did you buy that?” Happy crafting!
Designs For Cricut
cricut design
Cricut monogram designs
Cricut Shapes
Unique Cricut Sticker Designs
cricut watercolor projects
Cricut Cutfiles Collection