



Best Embroidery Logo Placement Ideas for Different Types of Clothing
Learn the best embroidery logo placement ideas for shirts, hoodies, jackets, and uniforms, with practical tips on logo sizes and accurate positioning.



Choosing the best embroidery logo placement is essential for creating professional, attractive, and well-balanced customized clothing. Whether you are designing corporate uniforms, promotional apparel, sportswear, or personalized garments, the position of an embroidered logo can influence its visibility and overall appearance. Selecting the right placement also helps maintain garment comfort, fabric flexibility, and consistent branding.
Different types of clothing offer different embroidery possibilities. A small chest logo may be suitable for a polo shirt, while a large back logo may work better on a denim jacket or promotional hoodie.
Fabric thickness, garment construction, logo dimensions, and embroidery machine capabilities should all be considered before selecting a placement.
This guide explains the best embroidery logo placement ideas for different clothing types, recommended logo sizes, and practical tips for achieving professional embroidery results.
Why Is Embroidery Logo Placement Important?
Embroidery logo placement plays an important role in the appearance and functionality of customized clothing. A carefully positioned logo can make a garment look professional while maintaining the original clothing design.
For businesses, consistent logo placement across employee uniforms helps maintain a recognizable brand identity. Clothing brands can also use different logo positions to create distinctive collections and provide customers with more design options.
Incorrect placement may cause a logo to appear crooked, oversized, or too close to garment seams.
Poor positioning can also make hooping difficult and increase the risk of fabric damage. Accurate measurements and proper embroidery preparation help reduce these problems.
Best Embroidery Logo Placement Ideas for Clothing
Several areas of a garment can be used for logo embroidery. The most suitable location depends on the clothing style, logo design, and available embroidery space.
1. Left Chest Logo Placement
Left chest embroidery is one of the most common choices for professional uniforms, corporate clothing, and branded apparel.
This placement provides clear visibility without covering a large portion of the garment. It works well for company logos, monograms, small illustrations, and business names.
A logo width of approximately 3 to 4 inches can be a practical starting point for many adult garments.
However, the final size should depend on the garment dimensions and logo complexity.
2. Right Chest Logo Placement
Right chest embroidery is a suitable alternative when the left chest contains a pocket or existing branding.
Many businesses use the left chest for their company logo and the right chest for employee names or job titles.
When embroidering both sides of the chest, maintain consistent positioning and balanced proportions to create a professional appearance.
3. Center Chest Logo Placement
Center chest embroidery is suitable for casual T-shirts, sweatshirts, hoodies, and fashion clothing.
This position provides additional space for larger brand logos, decorative lettering, and original artwork.
However, large embroidery designs can create stiff areas on lightweight fabrics. Selecting suitable stitch density helps maintain garment comfort and flexibility.
4. Full Back Logo Placement
Full back embroidery is commonly used on denim jackets, promotional clothing, workwear, and club apparel.
This placement offers room for detailed logos, larger lettering, and decorative designs.
Larger embroidery patterns may require additional machine time, thread, and stabilization.
Before stitching, confirm that the design fits within the machine's available embroidery field.
5. Upper Back Logo Placement
Upper back embroidery provides an alternative to larger back designs.
Small company logos, brand names, and decorative symbols can be positioned below the neckline or between the shoulder areas.
For hoodies, make sure the hood does not cover important parts of the embroidered logo.
6. Sleeve Logo Placement
Sleeve embroidery is suitable for secondary branding, sponsor logos, small symbols, and personalized initials.
This placement can be used on polo shirts, T-shirts, jackets, and sportswear.
Because sleeves provide limited embroidery space, smaller and simpler designs are usually more practical.
7. Collar and Cuff Logo Placement
Collar and cuff embroidery can add subtle branding to formal shirts and selected fashion garments.
Small initials, monograms, and simple business symbols work well in these areas.
Complex logos may be difficult to reproduce because of limited embroidery space and thick garment seams.
Recommended Embroidery Logo Placement and Size Chart
Choosing appropriate logo dimensions helps maintain balanced proportions across different types of clothing.
|
Logo Placement |
Suggested Logo Width |
Suitable Clothing |
|---|---|---|
|
Left chest |
3–4 inches |
Polo shirts, uniforms, jackets |
|
Right chest |
2.5–4 inches |
Workwear, corporate shirts |
|
Center chest |
4–8 inches |
T-shirts, hoodies |
|
Full back |
8–12 inches |
Jackets, sweatshirts |
|
Upper back |
3–8 inches |
Uniforms, jackets |
|
Sleeve |
1.5–3 inches |
Sportswear, polo shirts |
|
Collar |
0.75–2 inches |
Formal shirts |
|
Cuff |
0.75–1.5 inches |
Dress shirts |
These measurements are suggested starting ranges, not fixed industry requirements. Always consider garment size, logo proportions, and embroidery machine capabilities before selecting final dimensions.
Best Embroidery Logo Placement for Polo Shirts
Polo shirts are commonly used for corporate uniforms, promotional apparel, hospitality clothing, and business events.
The left chest is a practical location for company logos because it provides visibility while maintaining a professional appearance.
The right chest can be used for employee names, secondary logos, or department information.
Sleeve embroidery is another option for businesses that want to include additional branding without overcrowding the front of the shirt.
Since many polo shirts are made from knitted fabrics, suitable stabilization is important to prevent puckering and distortion during embroidery.
Best Embroidery Logo Placement for T-Shirts
T-shirts offer several embroidery placement options for casual clothing and personalized apparel.
Small left chest logos can create a simple appearance, while center chest embroidery provides room for larger decorative designs.
A small logo below the back neckline can also create subtle branding for fashion collections.
However, many T-shirts are made from lightweight knitted fabrics. Large and dense embroidery designs may reduce flexibility or create uncomfortable areas.
Choosing lightweight embroidery patterns and suitable stabilizers helps maintain the fabric's original characteristics.
Best Embroidery Logo Placement for Hoodies
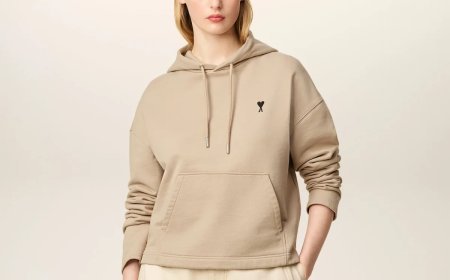
Hoodies provide multiple areas for custom embroidery, including the chest, sleeves, and back.
Left chest embroidery is suitable for small business logos and personalized branding.
Center chest placement is useful for larger lettering, decorative graphics, and fashion designs.
Sleeve embroidery can feature small brand symbols or vertical lettering.
Full back embroidery may also be suitable for promotional hoodies. However, the position of the hood should be considered to prevent important design elements from being covered.
For zip-up hoodies, avoid positioning embroidery too close to the zipper or reinforced seams.
Best Embroidery Logo Placement for Sweatshirts
Sweatshirts are suitable for both small and large embroidery designs, depending on their fabric construction.
Center chest embroidery can be used for brand names, decorative lettering, and original illustrations.
Left chest placement offers a more subtle option for corporate and casual clothing.
Small sleeve logos can provide additional decorative details.
Sweatshirts made from textured fleece may require suitable underlay and water-soluble topping to keep embroidery stitches visible on the fabric surface.
Best Embroidery Logo Placement for Jackets
Jackets provide opportunities for professional branding and decorative embroidery.
The most suitable placement depends on jacket construction, fabric thickness, lining, and intended use.
Denim Jackets
Denim jackets are suitable for many embroidery designs because of their relatively stable woven construction.
Large back logos, floral artwork, and decorative lettering can be used when the available fabric panel supports the design.
Small chest logos and sleeve embroidery are also practical options.
Avoid thick seams and reinforced areas that may interfere with hooping or needle movement.
Fleece Jackets
Left chest logos are a practical choice for fleece jackets.
Since fleece has a raised surface, embroidery stitches may sink into the fabric.
Suitable topping and underlay can improve logo visibility and stitch coverage.
Softshell Jackets
Softshell jackets can feature chest logos, sleeve branding, and back embroidery.
However, some softshell materials contain protective coatings or membranes that may be affected by needle penetration.
Check the garment manufacturer's recommendations before embroidering water-resistant or protective clothing.
Best Embroidery Logo Placement for Formal Shirts
Formal shirts generally require smaller embroidery designs to maintain a clean and professional appearance.
A small logo above the chest pocket can be suitable for corporate clothing.
Cuff embroidery is often used for initials and personalized monograms, while collar embroidery may provide subtle branding.
Since many formal shirts use lightweight woven fabrics, excessive stitch density can cause puckering.
Choose simple designs with appropriate stabilization and carefully prepared lettering.
Best Embroidery Logo Placement for Sportswear
Sportswear requires embroidery placement that considers fabric flexibility and physical movement.
Small chest logos are commonly used for team branding and sports organizations.
Sleeves can feature sponsor logos, while the upper back may provide space for team names or secondary branding.
Avoid large, dense embroidery in areas that need significant stretch or ventilation.
For certain lightweight performance fabrics, alternative decoration methods may be more suitable than machine embroidery.
Best Embroidery Logo Placement for Workwear and Uniforms
Workwear embroidery should balance professional branding with comfort and practicality.
Left chest embroidery is suitable for company logos, while right chest placement can be used for employee names and job titles.
Larger back logos may be appropriate for selected work jackets and promotional uniforms.
Businesses should maintain consistent logo positioning across different garment sizes and clothing styles.
For certified protective clothing, always confirm that embroidery modifications are permitted by the manufacturer before stitching.
Best Embroidery Logo Placement for Children's Clothing
Children's clothing requires smaller embroidery designs because the available fabric area is more limited than on adult garments.
Small chest logos, sleeve symbols, and simple monograms can work well on children's shirts, hoodies, and jackets.
Avoid large, dense designs that create uncomfortable or stiff areas.
For garments worn directly against the skin, check the reverse side of the embroidery for rough stitching and uncomfortable backing materials.
Logo dimensions should be adjusted according to garment size rather than using the same measurements for every age group.
How to Choose the Right Embroidery Logo Size
Selecting the correct logo size is just as important as choosing its placement.
A logo that is too large may affect garment flexibility, while a small and complicated logo may lose important details during embroidery.
Start by measuring the available embroidery area. Consider the original logo proportions, lettering size, and decorative elements.
For example, a company logo containing a long business name may require more horizontal space than a simple circular logo.
Small embroidery designs may also require artwork simplification to maintain lettering clarity.
Always check the design at its actual embroidery size before beginning production.
How Fabric Type Affects Embroidery Logo Placement
Different fabrics respond differently to needle penetration, thread tension, and stitch density.
Understanding fabric characteristics helps you select suitable logo placement and embroidery settings.
Cotton Fabric
Cotton is commonly used for T-shirts, polo shirts, and casual clothing.
Stable woven cotton can support several embroidery placements, while lightweight cotton knits require careful stabilization.
Small chest logos and simple decorative lettering can be suitable options.
Polyester Fabric
Polyester is widely used for uniforms, sportswear, and promotional clothing.
Some polyester fabrics are lightweight or stretchy, making them sensitive to dense embroidery.
Choose logo designs with suitable stitch coverage to maintain fabric flexibility.
Denim Fabric
Denim can support detailed embroidery designs depending on its weight and construction.
Large back logos, chest embroidery, and sleeve designs may work well on suitable denim garments.
However, thick seams and reinforced areas require careful preparation.
Fleece Fabric
Fleece has a raised surface that can cause embroidery stitches to sink into the material.
Suitable underlay and water-soluble topping may help maintain logo visibility.
The logo should also contain enough detail to remain recognizable on the textured surface.
Stretchable Fabrics
Stretchable fabrics require appropriate stabilization during embroidery.
Cut-away stabilizer is often useful because it continues supporting the stitches after production.
Avoid placing large, dense embroidery designs in areas that require frequent stretching.
How to Measure Embroidery Logo Placement Accurately
Accurate measurement helps prevent crooked logos and inconsistent embroidery placement.
Begin by laying the garment on a flat surface without stretching the material.
Identify suitable reference points, such as the collar, shoulder seams, button placket, or garment centerline.
Measure the intended embroidery location and mark the center point using a suitable removable fabric marker.
A printed embroidery template can help you visualize the final design before stitching.
For left chest logos, check the placement in relation to the garment's neckline and side seam.
For back logos, confirm that the design is centered across the intended fabric panel.
Businesses producing multiple garments should record approved placement measurements for each clothing style and size.
The Importance of Proper Hooping for Embroidery Logo Placement
Proper hooping helps keep fabric securely positioned during machine embroidery.
Incorrect hooping can cause fabric movement, crooked lettering, and design distortion.
Select an embroidery hoop that accommodates the logo dimensions and provides suitable access to the garment.
The Brother embroidery hoop grid guide explains how to mark the intended design center and align the fabric with an embroidery positioning sheet. This technique can help improve placement accuracy before stitching begins.
Make sure the fabric remains smooth and securely positioned without unnecessary stretching.
Check that pockets, sleeves, linings, and other garment layers are clear of the needle area before starting the embroidery machine.
How to Choose Thread Colors for Embroidered Logos
Thread color selection influences logo visibility and brand consistency.
For dark garments, lighter thread colors may provide better contrast.
For example, white or cream lettering can be clearly visible on black and navy clothing.
On light garments, darker embroidery threads can help define lettering and decorative details.
Businesses should use approved brand colors whenever possible.
However, certain color combinations may require adjustments to maintain logo visibility across different garments.
Before beginning production, compare the embroidery thread with the actual fabric under normal lighting conditions.
A test stitch-out can also help evaluate color contrast and thread coverage.
How Professional Digitizing Improves Embroidery Logo Placement
Professional embroidery digitizing converts logo artwork into machine-readable stitching instructions.
A digitizer considers the logo dimensions, fabric characteristics, intended placement, and embroidery requirements.
Accurate Logo Proportions
Proper digitizing helps maintain the original shape and proportions of a logo.
Resizing an embroidery file without reviewing its stitch properties can affect lettering, stitch density, and design details.
Preparing the file for its intended size helps reduce these problems.
Balanced Stitch Density
Stitch density affects thread coverage and fabric flexibility.
A small chest logo on a lightweight T-shirt may require different settings from a large back logo on a denim jacket.
Suitable stitch density helps reduce unnecessary thread buildup and fabric puckering.
Clear Lettering and Fine Details
Small embroidered logos often contain narrow lettering and decorative details.
Professional digitizing can help improve readability by adjusting letter spacing, stitch types, and line thickness.
Complex artwork may require simplification when embroidered in smaller areas.
Proper Underlay Stitching
Underlay provides support beneath visible embroidery stitches.
Different fabrics and logo placements may require different underlay settings.
Suitable underlay can help maintain stitch coverage and reduce unwanted fabric movement.
Efficient Sewing Sequence
The sewing sequence determines the order in which different logo elements are embroidered.
Careful planning can reduce unnecessary machine movements and help maintain alignment.
However, embroidery quality should remain the priority rather than simply reducing production time.
Common Mistakes to Avoid in Embroidery Logo Placement
One common mistake is choosing a logo that is too large for the garment.
Oversized designs can create an unbalanced appearance and affect fabric flexibility.
Another issue is placing embroidery too close to seams, zippers, or pockets.
These construction features may interfere with hooping and stitching.
Using identical placement measurements for every clothing size can also create inconsistent results.
A logo that appears balanced on a large adult shirt may look oversized on a smaller garment.
Incorrect thread colors can reduce logo visibility, particularly when embroidery and fabric colors are too similar.
Skipping test stitching is another avoidable mistake.
Testing allows you to identify placement, alignment, and stitching problems before completing the final garment.
How to Maintain Consistent Logo Placement Across Clothing Collections
Businesses often use the same logo across different clothing products.
For example, a company may order personalized polo shirts, hoodies, jackets, and workwear featuring identical branding.
Although the original artwork remains the same, the embroidery size and placement may need adjustments for different garments.
Create a placement record for each clothing type. Include approved logo dimensions, positioning measurements, thread colors, stabilizer requirements, and embroidery file versions.
Use a sample garment to confirm the logo's appearance before beginning larger orders.
Keeping these records can help reduce repeated preparation work and maintain consistent branding across future clothing collections.
How Embroidery Logo Placement Benefits Small Businesses
Small embroidery businesses can offer different logo placement options to meet customer requirements.
Corporate customers may prefer traditional left chest embroidery, while fashion brands may request larger center chest designs or subtle sleeve branding.
Providing several placement options allows customers to select designs that suit their clothing and intended use.
However, businesses should consider production costs when offering customized embroidery.
Large back logos often require more stitches, thread, and machine time than smaller chest designs.
Difficult embroidery locations, such as cuffs and sleeves, may also require additional preparation or specialized equipment.
Clear pricing and customer approval can help reduce misunderstandings before production begins.
Tips for Achieving Professional Embroidery Logo Placement
Successful logo embroidery starts with proper planning and preparation.
Select a placement that matches the clothing style, fabric characteristics, and intended purpose.
Measure the available embroidery area before preparing the logo file.
Choose thread colors that provide suitable contrast and maintain brand consistency.
Use compatible needles, appropriate stabilizers, and correctly sized embroidery hoops.
Check the logo's position using the machine's available alignment features.
Perform a test stitch-out before beginning commercial production.
For personalized clothing orders, confirm logo dimensions, colors, and placement with the customer before stitching the final garments.
Conclusion
Choosing the best embroidery logo placement for different types of clothing requires careful attention to garment style, logo size, fabric characteristics, and branding requirements. Left chest embroidery is a practical option for professional uniforms, while center chest, sleeve, collar, and back placements provide additional possibilities for personalized clothing and promotional apparel.
Accurate measurements, proper hooping, suitable stabilizers, and professional digitizing can help reduce common embroidery problems. Testing each design before production also helps maintain consistent logo placement and stitching quality.
Whether you are creating corporate uniforms, developing a fashion collection, or preparing personalized clothing for customers, selecting suitable logo placement can improve the appearance of your finished garments. For custom logo embroidery digitizing and professional design preparation services, zdigitizing.net is one option to consider for your next embroidery project.
Frequently Asked Questions About Embroidery Logo Placement
What Is the Best Embroidery Logo Placement for Clothing?
Left chest placement is a practical choice for corporate uniforms, polo shirts, and professional clothing. Center chest, sleeve, and back placements may be more suitable for casual clothing and promotional apparel.
What Size Should a Left Chest Embroidery Logo Be?
A logo width of approximately 3 to 4 inches is a useful starting point for many adult garments. The correct dimensions depend on garment size, logo proportions, and artwork complexity.
Should an Embroidered Logo Be on the Left or Right Chest?
Both placements can work well. The left chest is commonly used for company branding, while the right chest may be used for employee names, job titles, or secondary logos.
Where Should an Embroidered Logo Be Placed on a Hoodie?
Common hoodie logo placements include the left chest, center chest, sleeves, and back. Consider the location of pockets, zippers, and the hood before selecting the final position.
What Is the Best Embroidery Logo Placement for Jackets?
Left chest embroidery is suitable for professional jackets and workwear. Larger back embroidery can be used for promotional jackets, denim clothing, and club apparel.
Can I Use the Same Embroidery Logo Size on All Clothing Types?
Not always. Different garments have different dimensions, fabric characteristics, and available embroidery areas. Logo size should be adjusted according to the intended clothing type.
How Can I Prevent Crooked Embroidery Logos?
Use accurate measurements, removable fabric markings, positioning templates, suitable stabilizers, and proper hooping. Confirm the logo's alignment before starting the machine.
Does Embroidery Logo Placement Affect Production Costs?
Yes. Large logos and difficult embroidery locations may require more machine time, materials, and preparation. Actual production costs depend on stitch count, garment construction, equipment, and labor.
Is Professional Digitizing Necessary for Logo Embroidery?
Professional digitizing can help prepare embroidery logos with suitable stitch density, clear lettering, and accurate proportions. Proper machine settings and test stitching are also important for achieving consistent results.
What's Your Reaction?
 Like
0
 Dislike
0
 Love
0
 Funny
0
 Wow
0
 Sad
0
 Angry
0

ZDigitizing.net offers reliable embroidery digitizing and vector art services for businesses, designers, and embroidery enthusiasts. We provide custom logo digitizing, cap embroidery digitizing, patch designs, 3D puff digitizing, and high-quality machine embroidery files. Our focus is on accurate stitching, professional results, and dependable service for every project.











Comments (0)